MSP430 Reaction Game
Introduction Video
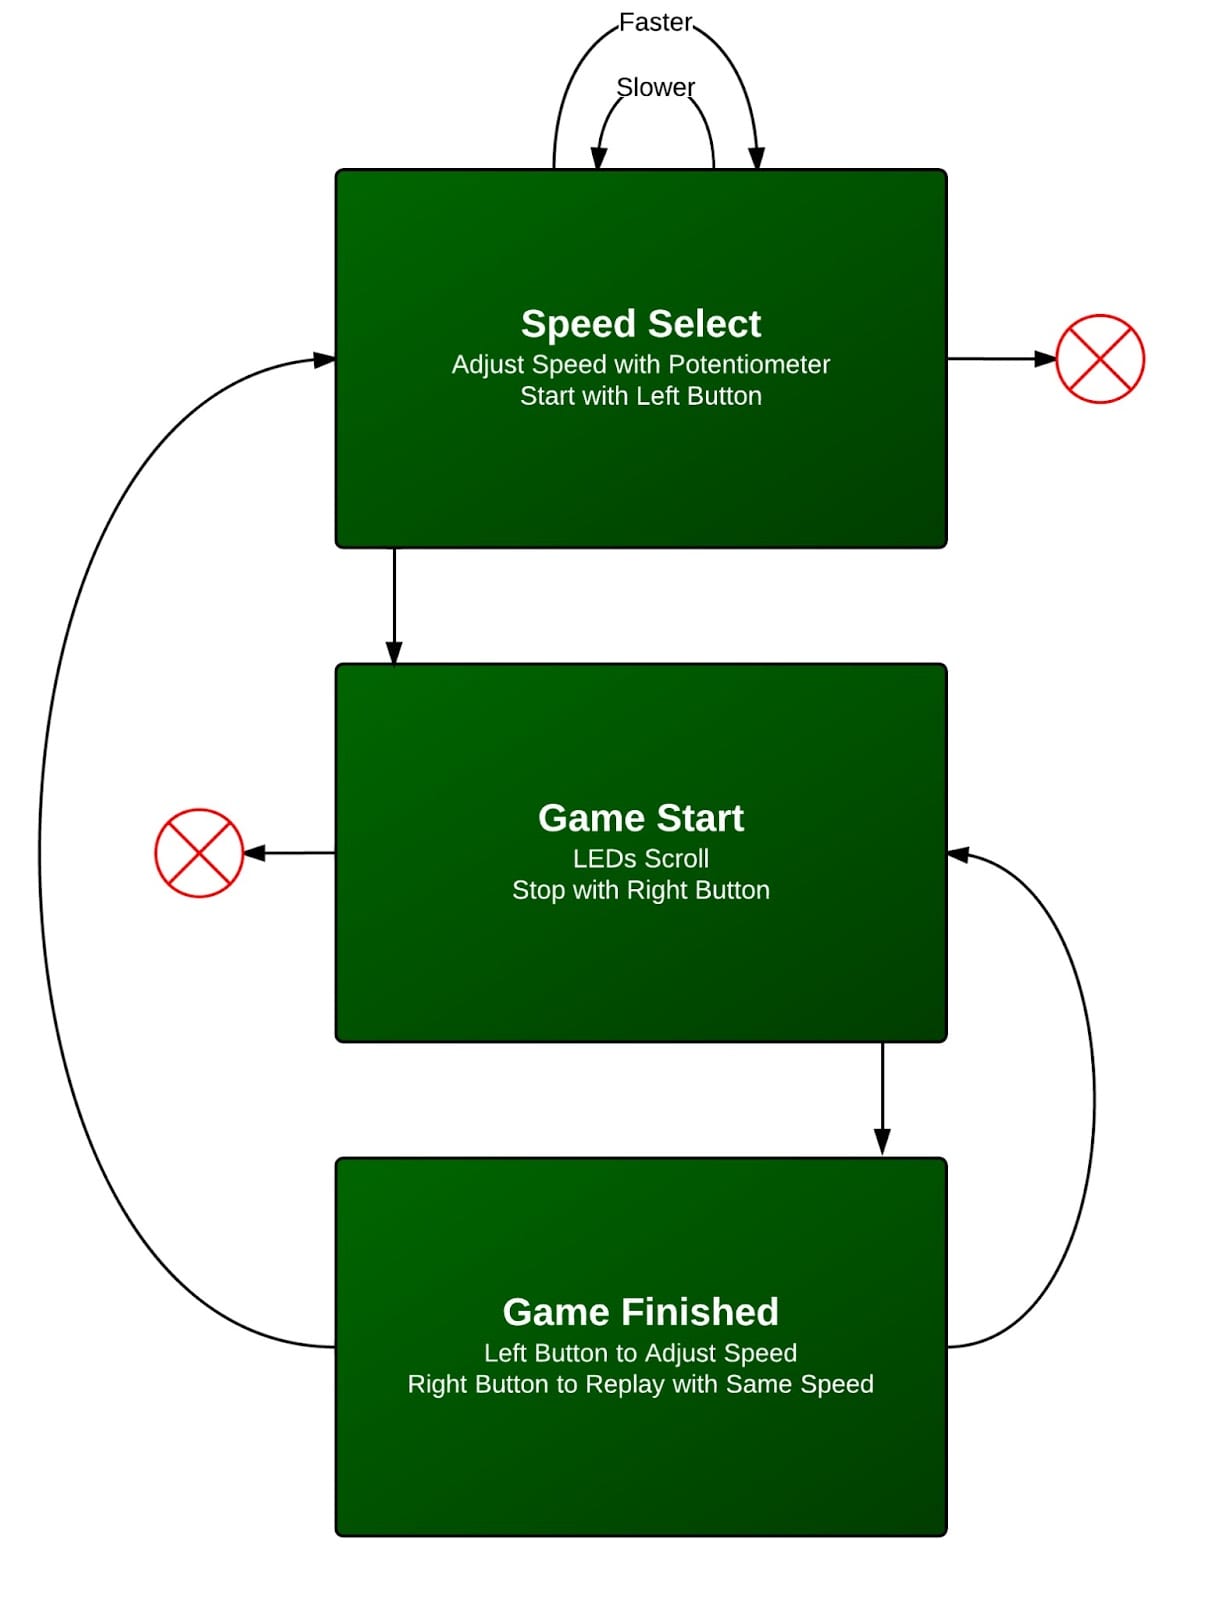
Edit: I've added the ability to restart the game with a different speed or the same speed after the game has been finished. You can view the flow chart of how the game is played below under the Gameplay heading.
Photos

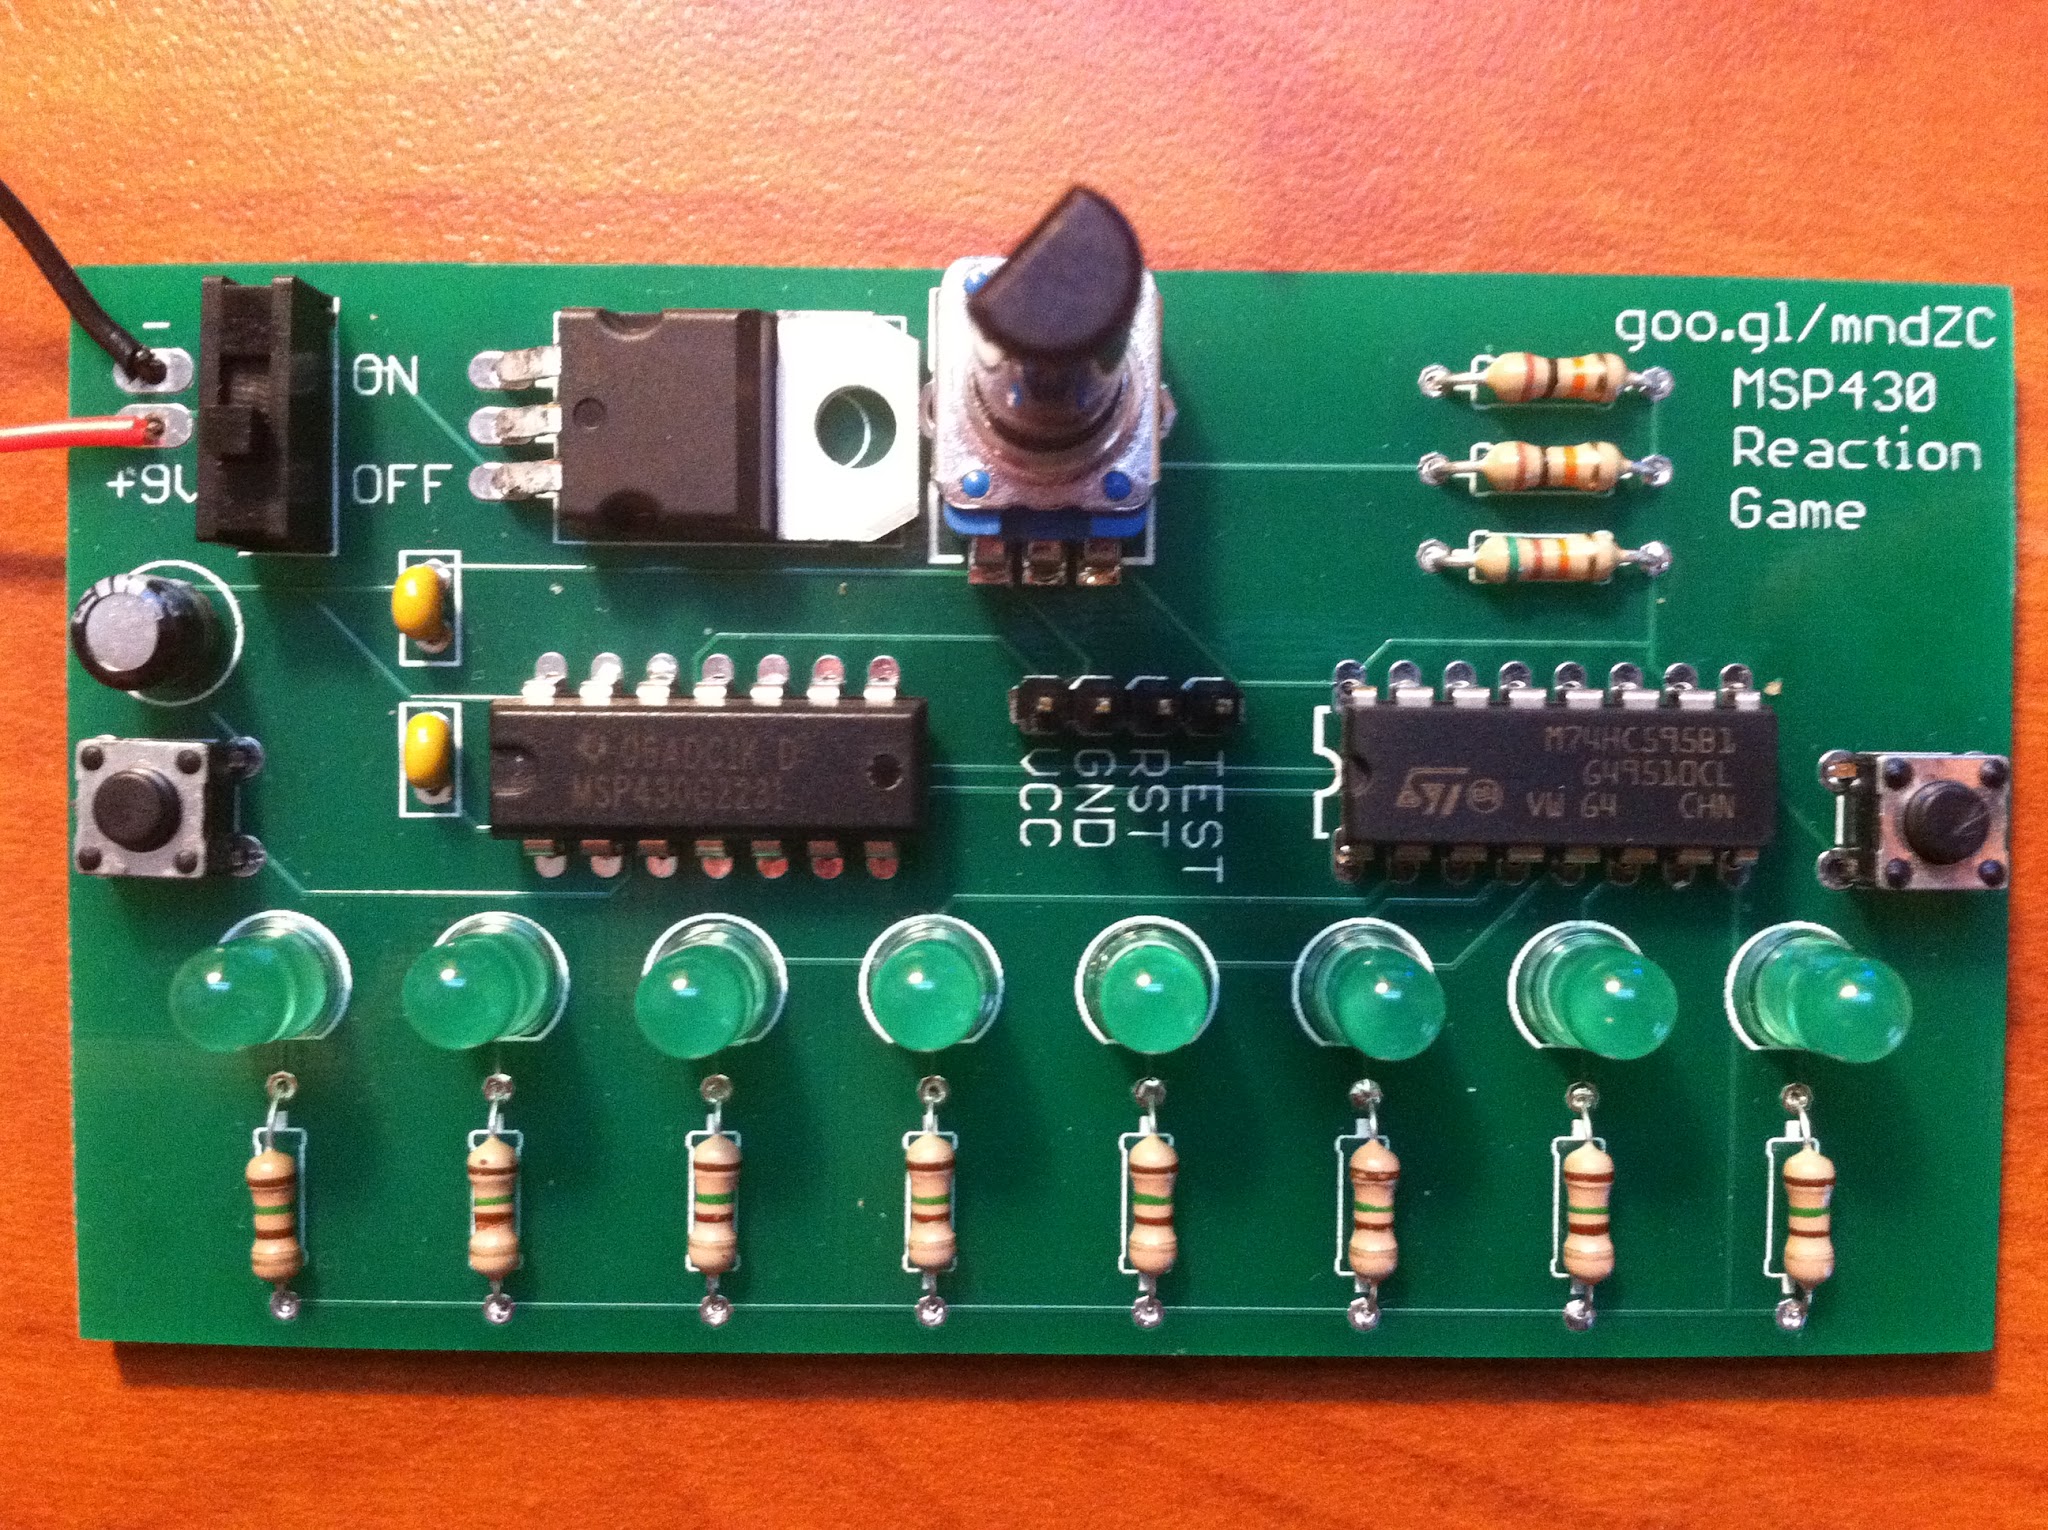
Fully populated board

Front of PCB

Rear of PCB
Gameplay

Files Needed
All digital files that are available, including the schematic, board files, code, and gerbers are located on my GitHub.
Some notes:
- The schematic and board files were designed in Eagle V6.0. I used parts from the SparkFun Electronics Eagle Libraries, the Texas Instruments Parts Library, and the stock Eagle library. I have modified some of the parts in each to better suit my needs.
- I used ITEAD Studio's DRC file for Eagle to try and meet their limitations for board design. There are errors from solder mask placement, but the boards turned out fine with them.
- I used Sparkfun's CAM file for Eagle to export the board files into gerbers. The gerbers that I sent to ITEAD Studio to be manufactured are located in the GerberFiles folder of my GitHub for anybody that wants their own board without having to go through all the steps to export it theirselves. Keep in mind the drill files use 2:4 Leading.
- The C code was created using Code Composer Studio V4.2.5.
Parts Needed
| Part | Where to order | Quantity | Description |
|---|---|---|---|
| 9V Battery Snap | Sparkfun Wishlist | 1 | Power supply for circuit |
| On/Off Switch | Sparkfun Wishlist | 1 | Turn the power on and off |
| 3.3V Voltage Regulator | Sparkfun Wishlist | 1 | Drop the 9V supply to 3.3V needed for the circuit |
| Potentiometer | Sparkfun Wishlist | 1 | Adjust the speed that the LEDs flash |
| 10KΩ Resistor | Sparkfun Wishlist | 2 | Pull up switches up to VCC |
| Pushbutton Switch | Sparkfun Wishlist | 2 | Select buttons to start and stop the game |
| 10uF Electrolytic Capacitor | Sparkfun Wishlist | 1 | Needed for voltage regulation |
| 0.1uF Ceramic Capacitor | Sparkfun Wishlist | 2 | Needed for voltage regulation and for MSP430 voltage decoupling |
| LED | Sparkfun Wishlist | 8 | Display for game |
| 330Ω Resistor | Sparkfun Wishlist | 8 | Current limiting for LEDs |
| 74HC595 | Sparkfun Wishlist | 1 | Drive 8 LEDs with 3 pins of MSP430 |
| Programming Header | Sparkfun Wishlist | 1 | Allows for in-circuit programming of the MSP430 |
| Female-to-Female Jumper Wires | Sparkfun Wishlist | 1 | Connect programming header to TI Launchpad |
| TI MSP430 Launchpad | Texas Instruments | 1 | To program the MSP430 chip |
| MSP430G2231 | Texas Instruments | 1 | Microcontroller to do the hard work |
| 47KΩ Resistor | Digikey | 1 | Pulls RST line up to VCC |
Advice
- Polarity (direction) only matters on the round capacitor, not the two other capacitors. Align the side with the white line on the capacitor with the minus sign on the board.
- In the Sparkfun Wishlist, there are short or tall buttons. Choose one or the other. They both work but I prefer the short ones. I may end up using the tall ones if I 3D print a case for the game.
- None of the resistors are absolute values. I didn't have the 47KΩ, so I used a 50KΩ one. I also used 150Ω resistors for the LEDs instead of the 330Ω resistors on Sparkfun.
- The MSP430G2231 microcontroller should be included with the Launchpad kit from Texas Instruments.
- You can use one of the following two ways to program the microcontroller:
- Solder the MSP430G2231 and the programming headers to the board and use these jumper wires (or similar) to program it in-circuit.
- Add a DIP Socket to the board where the MSP430G2231 should go and move the MSP430 chip to the Lauunchpad to program it. The programming header and female-to-female jumper wires won't be necessary with this method.
How to Program MSP430G2231 on Windows

Programming hookup (Explained in step 5)
- Download and install the newest version of Code Composer Studio
- Download the code file located on my GitHub
- Create a new CCS Project in Code Composer Studio
- Name it as you wish
- On the fourth window, set the device variant as MSP430G2231
- Leave everything else as the default values
- Right click the new project file on the left side and select "Add Files.." and choose the .c code file downloaded from GitHub
- Attach the VCC, GND, RST, and TEST pins as seen above (ensure that only the Launchpad is powering the circuit)
- Choose the bug icon to "Debug Active Project"
- It should move to the Debug Pane on Code Composer Studio
- Press "F8" or the green and yellow button that looks like "| |>" to run the code and ensure it works
- Congrats, the MSP430G2231 chip is programmed!
Future Plans
I bought a Printrbot from Kickstarter because I've been interested in 3D printing and thought this was the best and lowest-cost way of doing it myself. When I finally recieve it, I will design a case for this game. I will add the files when I finally make it.
I have also thought about making another version of this game with nothing but surface mount parts. I plan on adding two colors of LEDs so it can randomly pick a position to stop the LED by lighting that position in a different color. It would also have the logic to determine if you've won by matching them or lost by being off. This is currently nothing but an idea but I will but I will put work into it when I have more free time after school is out over the Summer.

